Thursday, December 25, 2008

Assignment 2


Step 1

The first step is to design the layout. I used Rectangular Marquee Tool and fill it with Blue color


Insert the text


Then apply layer effect on the text.
I've applied these effect on 'MMU' and 'FOM' text and save it as 'Text' style
  • Inner Shadow
  • Drop Shadow
  • Inner Glow
  • Bevel and Emboss
  • Contour
  • Gradient Overlay (Purple)


For 'Open Day' text, I used Blue color and choose Warp Text for 'Day'


Step 2

Insert the MMU logo at the center and changed its effect (Bevel and Emboss)
Here you can see the difference


Step 3

Next, add the 'papernote' and change its levels (Ctrl+L) to increase the details


Insert text and change the font to 'Monotype Corsiva'.
For the text 'Checklist for my Success', I changed some of the effect


To create the 'check', I used Polyganol Lasso Tool and fill it with Black color
Then duplicate it by pressing Alt+Move


Step 4

For the 'Bee Robot' image, I want to create a cartoon effect.
I used the Cutout effect(Filter>Artistic>Cutout)
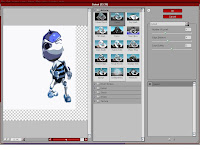


Arrage the image and add the 'Contact' text at the bottom of the wallpaper

Step 5

I want to use two images and add them as Polaroid pictures.
  1. The first step is to open the image on a new file
  2. Create a new layer and fill it with white
  3. Resize the layer and merge both layers
  4. Move the Polaroid picture to the Open Day Wallpaper


Step 6

The last step is to create the 'CERTIFIED QUALITY' stamp
Open a new file and type the text with Red color


Use the Rectangular Marquee Tool to create a border, and apply stroke (Edit>Stroke)


To create the effect,use Filter>Brush Strokes>Spatter
Lastly, add the image using the Move Tool


Place the image and change the mode to Darken, Fill 88%


This is the final image


The Making of Tutorial 6

Step 1

The first step is to create the wallpaper. Create a new layer and fill it with color like the picture shown below


Go to channels, create a new alpha channel. Then choose Filter>Render>Fibers


Select the Wallpaper layer,choose Filter>Render>Lighting Effect(Make sure the texture channel is Alpha 1)


Step 2

Go to Paths, select the 70's (Ctrl+Click). Fill with white and name the layer basic chrome shape

.
Go to channels,create a new channel with the 70's selection and apply stroke(Edit>Stroke). Then apply Gaussian Blur


Next go to Image>Calculations. Change the mode to 'Difference'


Apply Curves(Ctrl+M) and save the selection. You will see the difference in the preview.


Step 3

Bring the 70's selection into the layer. Next, open the 'twenty dollar' image and drag it into the 'background' file. Apply Gaussian Blur to the 'twenty dollar'. Then apply curves and load the saved selection before.


Adjust the selection by pressing Ctrl+L to change the levels.
Next, add mask layer to the selection.


(You can disable the layer mask to adjust the setting)

Lastly, go to Hue/Saturation setting to colorize it and to achieve the chrome effect.


Step 4

To create the shadow,go to Channels and make a copy of the 70's selection. Select it into the layer and fill it with Black. Apply Gaussian Blur and use the Lasso Tool for selection
(image below). The use Feather Selection(Select>Feather)


Next, we need to soften the shadow to make it more realistic. Use Motion Blur(Filter>Blur>Motion Blur) and adjust the settings.


This is the final image

Thursday, December 18, 2008

Tutorial 5

Techniques learned on tutorial 5
  • Blending images
  • Cloud effects
  • Liquify Effect
  • Using Lasso Tool and Marquee Tool to make selections
This is the image for Tutorial 5

The Making of Tutorial 5

Step 1

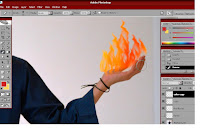
Create a new layer and name the layer as 'flames'. Draw a flame shape using the Lasso Tool.
Press Alt + Del to fill the flame with white color(press X to change the color selection to white)


Apply Gaussian Blur (Filter>Blur>Gaussian Blur) to 1.5 pixels


Next is to fill the flame with Grey color to create the effect.
Make sure you click the Lock Transparent Pixel on the Layers bar


Choose the Brush Tool(Click D key for Default) and apply to the flame.
Make sure the hardness is 0%


Next step is to save the brush pattern. Go to Edit>Define Brush Preset and save it as 'flame'


Now we will apply the brush pattern to make the flame. Create a new layer and name it as 'final flames'.Choose Brush Tool and click on the 'flame' pattern. Apply the brush and change the size accordingly.


Step 2

The next step is to create the flame colors. Create a new layer and name it as 'color'.
Use the Rectangular Marquee Tool to draw a square.
Make sure the color selection is dark red and yellow. Then click Filter>Render>Clouds
Adjust the color by pressing Ctrl + L to open the levels options.


To fill the flame color, go to 'final flame' layer and press Ctrl+Click.
Press Shift+Ctrl+I to make an Inverse.
Go to 'color' layer and press Del


To make the flames effect more realistic, we can use liquify (Filter>Liquify)


Copy the flames by pressing Alt and move it to the other hand.
Use Eraser Tool to fit the flames on the other hand.


Step 3

Next is to create a smoke in the background. First, create a new layer and name it 'smoke'.
Use Lasso Tool and fill the selection with white (X) by pressing Alt+Del.


To make the smoke colors, change the color palette to Default (press D) , and use
Filter>Render>Clouds


Choose Multiply on the layers selection and use the Eraser Tool to clean the image.


This is the final image