Wednesday, November 26, 2008

The making of Assingment 1 : Postcard

Postcard


Step 1

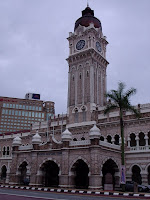
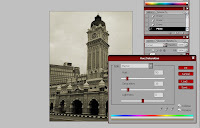
The first step is to set the background. I've used the Hue/Saturation adjustment to create a 'classic' texture for the postcard.
Step 2

The next step is to add and edit all the images that I wanted to use. The first image is the Malaysian dance picture. I opened the image and use Magic Wand Tool to eliminate the background. I mostly use this tool on all my images.
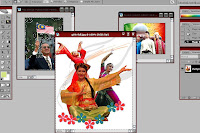


After that, I use the Erase Tool to clean the edges and to achieve better result.

Next, I applied the image to the background and set the Opacity = 87% and Fill = 93%. This method will create a light transparency image.
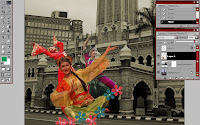


I applied the same techniques for other images except Tun Mahathir image. I left the image to its normal setting. Then, I've arranged the images like the picture below...
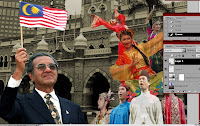


Step 3

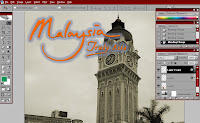
The next step is to add the slogan " Malaysia,Truly Asia".
First, I add an Outer Glow effect on the slogan.
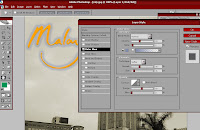


Then I've duplicate the same layer to make the color of the slogan a little bit darker.


Step 4

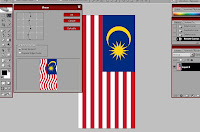
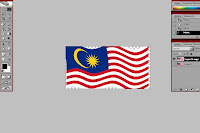
The last step is to edit the Malaysian Flag. I use Distort for the effect to make it more realistic.
First, you need to rotate the flag (Image>Rotate Canvas>90 CW)
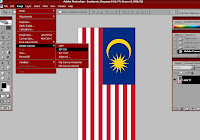


Then, apply distort (Filter> Distort>Shear). You can see the changes in the preview box.
After all the settings are complete, rotate back the flag to its original using the same technique.


Step 5

The first step is to arrange the flag. I resized and placed the flag by simply pressing Ctrl+T.
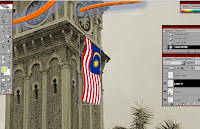


Next, I want to blur the image a little bit. I've duplicated the same layer to make a copy. Then, I've applied Gaussian Blur(Filter>Blur>Gaussian Blur) to the original layer mask.
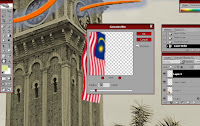


On the copy layer, add a layer mask and set the color to black (Ctrl+Del).
In this case, I wanted to blur the flag except the blue color area (crescent moon and the star).
So make sure the copy layer is above the original,select Brush Tool(white) and apply to selected area. The area will have a clear image.
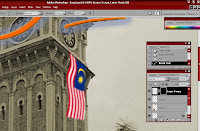


Lastly, I've added a Drop Shadow effect on the flag.
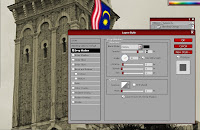
Assignment 1 Progress

These are some of the images that I used for Assignment 1


This is my first postcard that I did using Photoshop.


After consulting Mdm Lydia, she told me to change the background as the image selected is not suitable for the postcard. So I choose another image as my background and made several changes from the first postcard.


.


Project Charter : Assignment 1

Assignment 1 title

Printout postcard for the theme "Malaysia,Truly Asia"

Project Start Date

22 November 2008

Project Finish Date

28 November 2008

Project Manager

Mohd Shahrul Izwan

Email

mcg1014.1031135749@gmail.com

Website

http://mcg1014-1031135749.blogspot.com/

Project Objective

To create a multi-cultural event for a post card. The theme would be "Malaysia,Truly Asia" which is the official slogan for Malaysia Tourism. Students are to show the multi-cultural aspects of Malaysia culture or life as a positive feature to attract tourist into this country.

Approach


Idea

Show the beauty of Malaysia and its people.It's a tourism postcard to attract visitors using nature/landmark scenery.In the postcard, it visualize that Malaysians are friendly and people are always welcome. It also shows that Malaysia is a multiracial nation and lives harmony with each other.

How do you create the postcard
The idea is to show the beauty of Malaysia and its friendliness. For this assignment, I will use Adobe Photoshop Cs2. I used basic techniques based on the tutorial videos that were provided and some of my own practice with Photoshop. I used one of Malaysia's famous landmark as the background. Then I will add an image of a group of Malaysians with different nationality and culture. Next, I'll add and edit a Malaysian Flag to include it in the postcard. Lastly, I will add the "Malaysia,Truly Asia" slogan.

Tools in Photoshop
  • Gaussian Blur
  • Set center guides and blur selection for perspective
  • Hue/Saturation Adjustment
  • Eraser and Brush Tool
  • Magic Wand Tool

Roles and Responsibilities

  • Research about Malaysia,Truly Asia
  • Choose suitable images based on my idea
  • Edit using Photoshop
  • Consult and improve image
  • Print out assignment
  • Submit assignment

Time Plan
22 November 2008
  • Search images based on ideas
  • Search images for reference
  • Practice tools in Photoshop
23 November 2008
  • Review tutorial videos
  • Edit selected images
  • Practice tools in Photoshop
24 November 2008
  • Edit images in Photoshop
25 November 2008
  • Showed progress in class and received comments
  • Edit pictures based on comments given
26 November 2008
  • Edit images in Photoshop

Comments

Basically, this is the first time that I use Adobe Photoshop. I am interested in learning Photoshop and hopefully will be able to complete all my assignments. I did face some difficulties in Photoshop especially in techniques to make the edited images blend with the background. I use the tutorial videos and some practice on my own to solve these difficulties.

Reference images


The making of Tutorial 2

Step 1
First, I need to change the blue sky to grayscale. I create a new layer and choose the 'color' selection.


I used the Brush Tool and applied it on the sky. This will turn its color to grayscale. Make sure the brush color is in default mode.

Step 2
Next, I used the Hue/ Saturation adjustment to change the color of the image. In this image, I decrease the tone color a little bit.


Here you can see the difference


Step 3
Lastly, I changed some of the colors in the image. In this step, I've applied the same technique in step 1 (new layer and 'color' selection). Then I use the Brush Tool and choose colors to make changes.


This is the Final Image


Tutorial 2

These are some of the techniques that I've learned in tutorial 2 videos
  • Applying grayscale to an RGB image
  • Colorize a selection with a Hue/Saturation adjustment
  • Colorize an image with a Hue/ Saturation adjustment
  • Pen tool
  • Create new channel
For tutorial 2, I use this image in Photoshop

Wednesday, November 19, 2008

Computer Graphics 2

Photoshop Tutorial 1

I've learned several techniques using Photoshop through the videos tutorial
  • Make a selection,scale & rotate
  • Drag and copy images
  • Blur techniques(Gaussian and Radial)
  • Mask technique
  • Scan Line (Halftone Pattern filter & the Overlay Blend Mode)
These are the basic pictures used to complete Tutorial 1

The making of Tutorial 1

Step 1
First, I've dragged the starfish into the skyscraper image. Duplicate it by holding Alt key and resize all the images. Next, I applied the blur effect(Gaussian). Then I edited some of the effects using techniques learned from the video tutorials.

Step 2
To add the Tv screen into the background, first i opened the Tv screen image. Select the screen and the apply the Halftone Pattern effect.Then I edited the image using techniques learned from the video tutorials.
Drag the image into the background, and resize it. Then, I've arrange the Tv screen according to the video tutorial .
Step 3
Lastly, I've applied the shadow effect that was taught in the video tutorials. I've also learned to used the lasso tool to create the shadow on the Tv screen.


Final Work