First, I open the image for tutorial 4 and choose Gradient Overlay

In the Gradient Editor, choose dark blue as the color on the left picker and light blue on the right
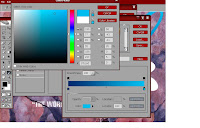
Next, I need to create a water effect on the Ink text. Choose the Inner Shadow effect and set the details as in the picture below

Then apply the Drop Shadow effect

Choose the Outer Glow and make sure the color is set to black


Next, choose the Bevel and Emboss effect. Set the details according to the image below


This is the result

Step 2
The next step is to save all the effect into a new style. Go to Style and drag and drop the layer that has been edited. A box will appear and save it as 'Aqua Viva 1'

Step 3
I will apply the same effect on both of the Ink Splat. Just select the layer and click on the style that was saved before which is 'Aqua Viva 1'. Here you can see that I have changed the gradient on one of the Ink Splat.

Step 4
Next, I will create a new texture from the background. The first thing to do is to go to Channels, select the Green channel and make a copy. Next, apply the Gaussian Blur to reduce some of the sharpness. Press Ctrl+L to open the Levels to set some details to the texture.


Next, go to Edit>Define Pattern to save the texture and name it as Rust
Go to Layers and click on the Ink Splat's effect to open the Layer Style box
Choose Bevel and Emboss and tick on the texture box. Choose the pattern that was saved before which is Rust and set the details.

You can see the difference on the Ink Splat as it blends with the texture of the background. Now save the new effect (Step 2) and name it as 'Aqua Viva 2'
Step 5
The next step is to apply layer mask and use the Brush Tool.
Select the background and create a rectangle using the Rectangle Tool(background will be black). Fill the layer with 'Aqua Viva 2' and you will get this image.

Apply a layer mask and go to the second icon and press Ctrl+Del to fill the background with black color. Then choose the Brush Tool to paint

As you paint, the 'Aqua Viva 2' effect will fill the background

Step 6
Lastly, to create an Ice effect, open the Layer Style box.
Choose the Blending Options and tick the Blending Interior Effects as Group option.
Next, set the Fill Opacity to change its color

This is the final result

No comments:
Post a Comment