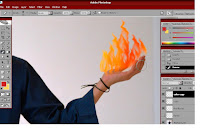
Create a new layer and name the layer as 'flames'. Draw a flame shape using the Lasso Tool.
Press Alt + Del to fill the flame with white color(press X to change the color selection to white)

Apply Gaussian Blur (Filter>Blur>Gaussian Blur) to 1.5 pixels

Next is to fill the flame with Grey color to create the effect.
Make sure you click the Lock Transparent Pixel on the Layers bar

Choose the Brush Tool(Click D key for Default) and apply to the flame.
Make sure the hardness is 0%

Next step is to save the brush pattern. Go to Edit>Define Brush Preset and save it as 'flame'

Now we will apply the brush pattern to make the flame. Create a new layer and name it as 'final flames'.Choose Brush Tool and click on the 'flame' pattern. Apply the brush and change the size accordingly.

Step 2
The next step is to create the flame colors. Create a new layer and name it as 'color'.
Use the Rectangular Marquee Tool to draw a square.
Make sure the color selection is dark red and yellow. Then click Filter>Render>Clouds
Adjust the color by pressing Ctrl + L to open the levels options.


To fill the flame color, go to 'final flame' layer and press Ctrl+Click.
Press Shift+Ctrl+I to make an Inverse.
Go to 'color' layer and press Del


To make the flames effect more realistic, we can use liquify (Filter>Liquify)

Copy the flames by pressing Alt and move it to the other hand.
Use Eraser Tool to fit the flames on the other hand.

Step 3
Next is to create a smoke in the background. First, create a new layer and name it 'smoke'.
Use Lasso Tool and fill the selection with white (X) by pressing Alt+Del.

To make the smoke colors, change the color palette to Default (press D) , and use
Filter>Render>Clouds

Choose Multiply on the layers selection and use the Eraser Tool to clean the image.


No comments:
Post a Comment